
Authentication
Authenticate with your secret key and keep keys secure
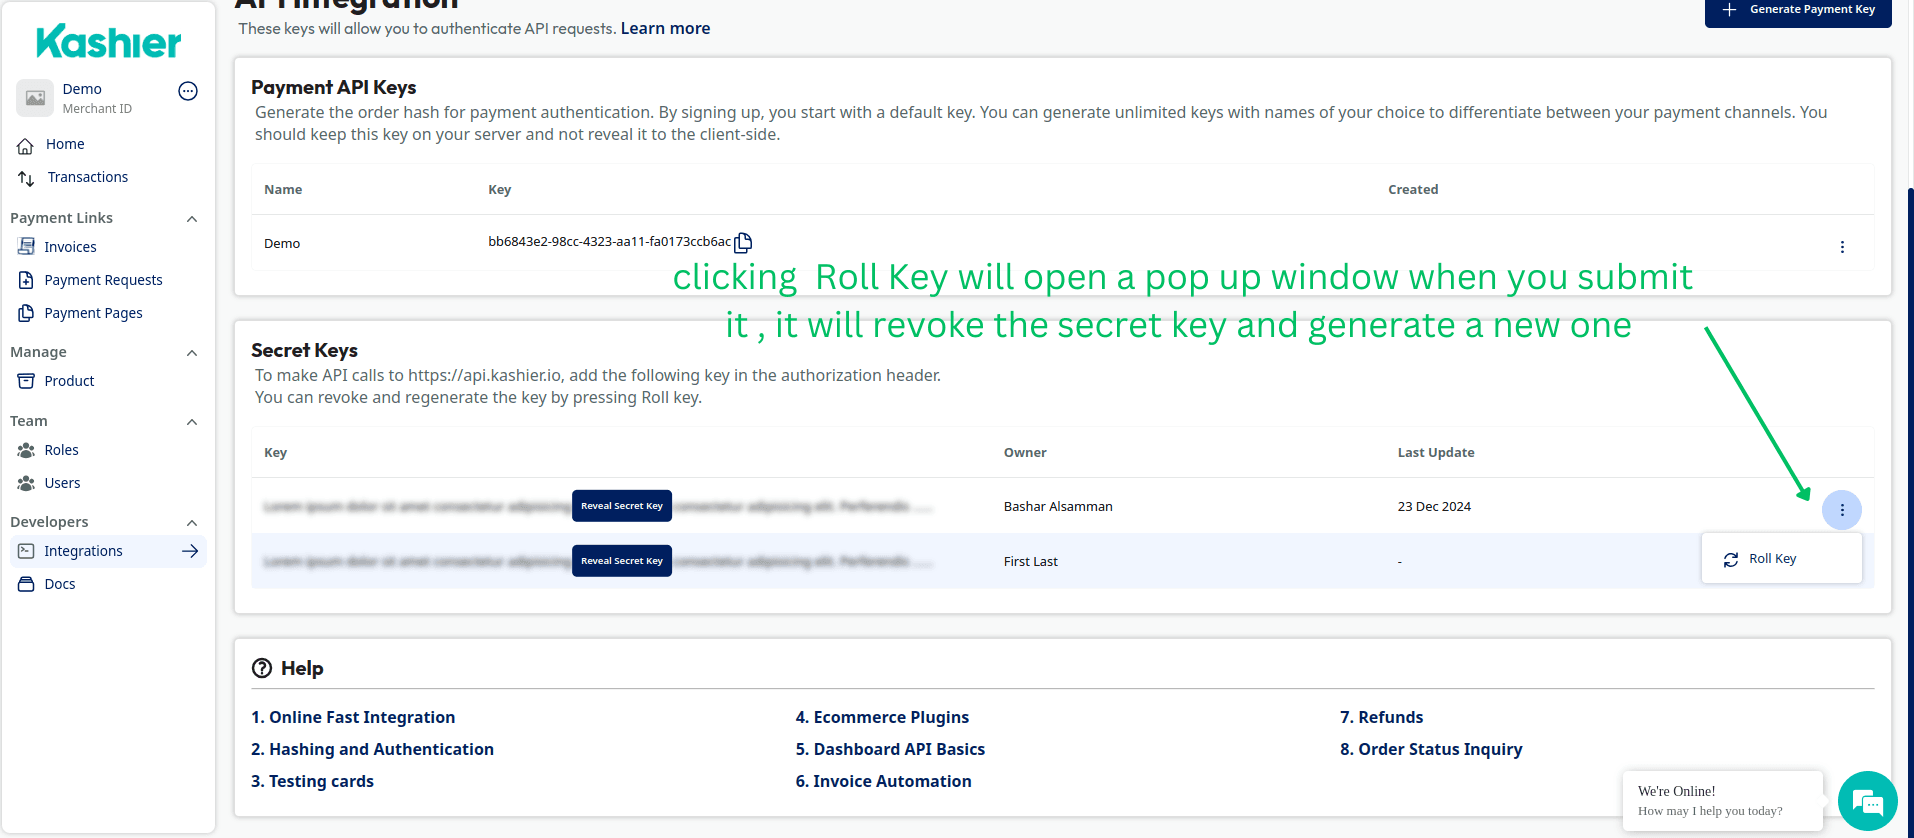
Authenticate your API calls by including your secret key in the Authorization header of every request you make. You can view and manage your secret keys from the Dashboard > Integrate now > Secret Key.
Generally, we provide both payment API keys and secret keys. The secret key is used to authenticate your API calls by including it in the Authorization header of every request. The payment API key is used to generate the order hash for payment authentication. When signing up, you are provided with a default key, and you can generate unlimited keys to track your channels.
Your API keys carry many privileges, so keep them secure! Do not share your secret API keys in publicly accessible areas such as GitHub or client-side code.
Secure your secret key
Do not commit your secret keys to Git or use them in client-side code.
Each account is provided with separate keys for testing and live transactions. All API requests exist in either test or live mode, and one mode cannot interact with objects in the other.
All API requests must be made over HTTPS. Calls made over plain HTTP will fail. API requests without authentication will also fail.
Authorization headers should follow this format: Authorization:SECRET_KEY.
Sample Authorization header:
Authorization: f86a28e62b452ee94a32dc49cde00047$491a5ae27e91294e97247b742d1727600d7b17297309820c590e0cbc0d8b48bc923aa94c5501619882248e58eb7ccUnauthenticated and rejected requests do not all return the same status code:
| Scenario | Status | Body |
|---|---|---|
No Authorization header sent | 403 | { "message": "No auth token provided" } |
| Invalid or expired credential | 401 | { "error": "Authorization error", "message": "..." } |
| Secret key cannot be decrypted | 401 | { "message": "Invalid secret key" } |
| Caller IP not allow-listed | 403 | { "message": "Unauthorized IP address" } |
Only invalid credentials return 401. A missing header returns 403. See Error responses for the full catalog.
Select the acting merchant
A user can belong to more than one merchant. When that is the case, send the authmerchantid header alongside Authorization to choose which MID the call acts on. Without it, Kashier cannot resolve your role for the request.
GET /v2/customers HTTP/1.1
Host: test-api.kashier.io
Authorization: f86a28e62b452ee94a32dc49cde00047$491a5ae27e91294e97247b742d1727600d7b17297309820c590e0cbc0d8b48bc923aa94c5501619882248e58eb7cc
authmerchantid: MID-00-000
curl --location 'https://test-api.kashier.io/v2/aggregator/transactions' \
--header 'Authorization: YOUR_TEST_SECRET_KEY' \
--header 'authmerchantid: MID-00-000'If your user belongs to a single merchant, you can omit the header.
IP allow-list
Calls authenticated with a secret key are also checked against your merchant's IP allow-list, after the key itself is validated. A call from a source that is not on the list is rejected with:
{ "message": "Unauthorized IP address" }The response status is 403.
Key points:
- The allow-list is opt-in. An empty list allows all source IPs; add at least one entry to start restricting.
- The check applies only to secret key calls. Dashboard session (JWT) callers are not IP-checked.
- The client IP is read from the first entry of
X-Forwarded-For, falling back to the connecting socket address. Behind a proxy or NAT, allow-list the egress IP your traffic actually leaves from. - Manage the list from the Kashier dashboard. Update it before you migrate servers or change egress IPs, otherwise live calls start failing with 403.
Getting a 403 you cannot explain
Check the IP allow-list before re-issuing keys. A valid secret key called from a new server IP returns Unauthorized IP address, not an invalid-key error.
Keeping your keys safe
Your keys can be used to perform actions on behalf of your account, such as creating charges or issuing refunds. Treat your keys like any other password — grant access only to those who need it. Ensure they are excluded from version control systems. Use a password manager or secrets management service to manage access securely.
Compromised keys
If a secret key or payment API key is compromised, immediately expire the key from the Kashier dashboard to prevent data leaks. You can do this by changing a user secret key or deleting a payment API key and generating a new one. Update both the dashboard and your system simultaneously to avoid downtime, as Kashier immediately invalidates expired keys.
Teams and user roles
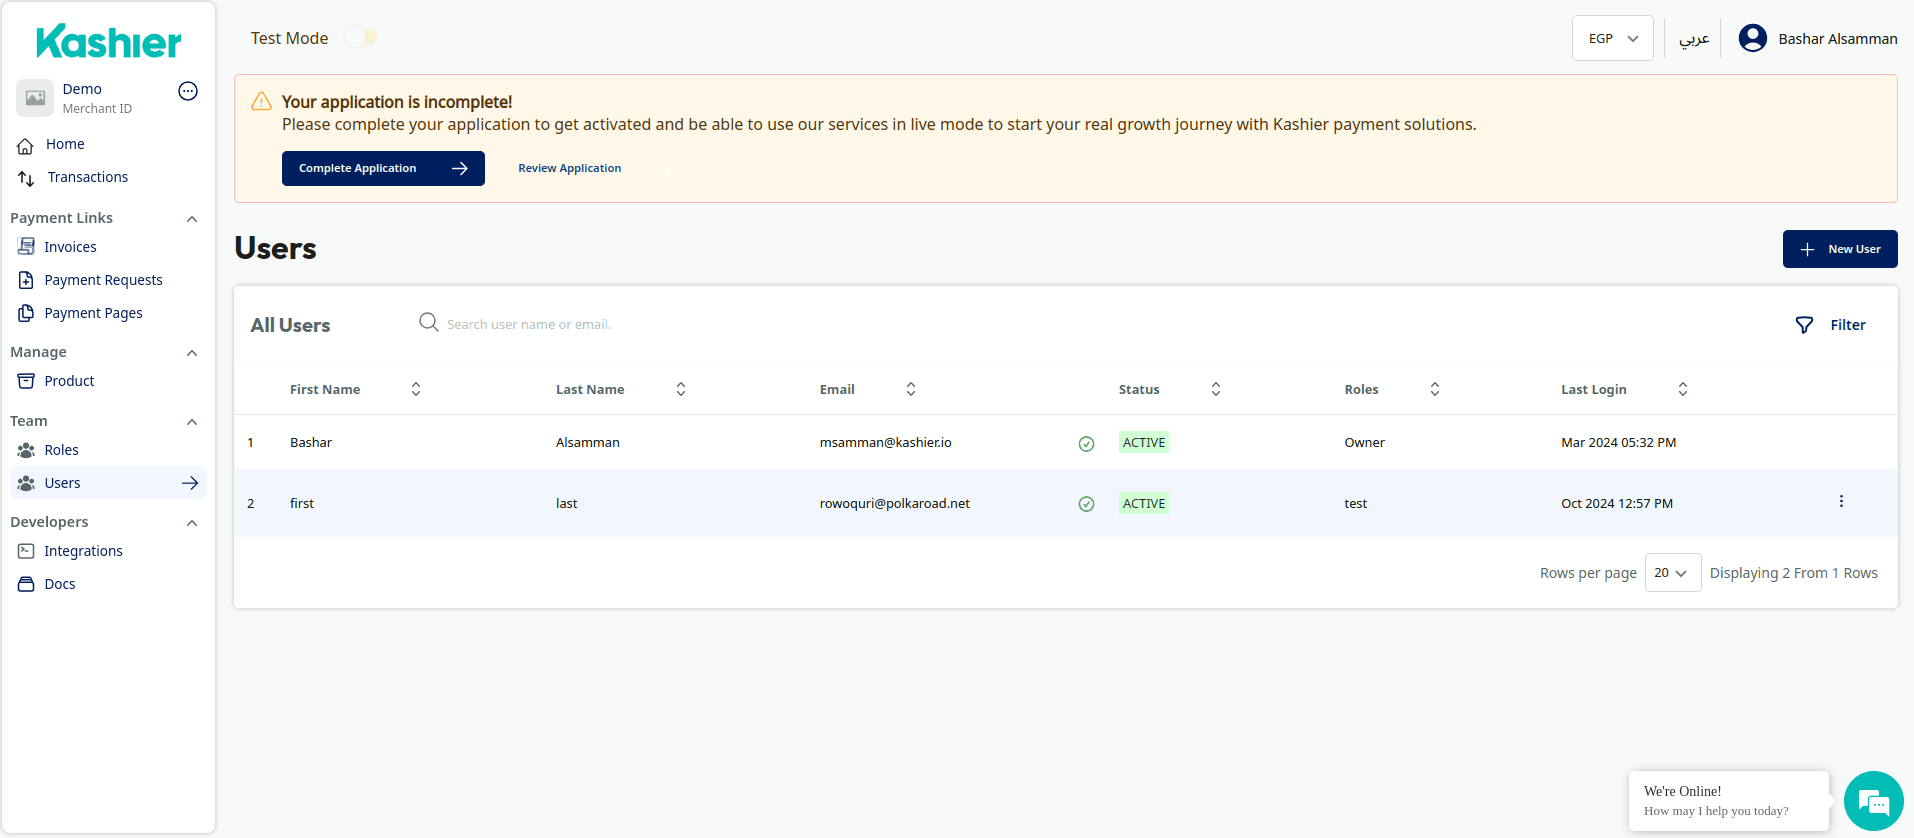
Give team members controlled access to your Kashier account. You can invite other team members to access your account. To protect sensitive information or restrict their actions, user roles define their permissions. Manage team members and user roles on your account's team member settings page > manage team. Add team members individually using their email addresses.
Steps to manage your team members' user roles
- Log in to your Kashier Dashboard and navigate to Settings.
- Select "Manage Team," then choose the user you want to edit. Click the three dots in the top-right corner and select "Edit User."
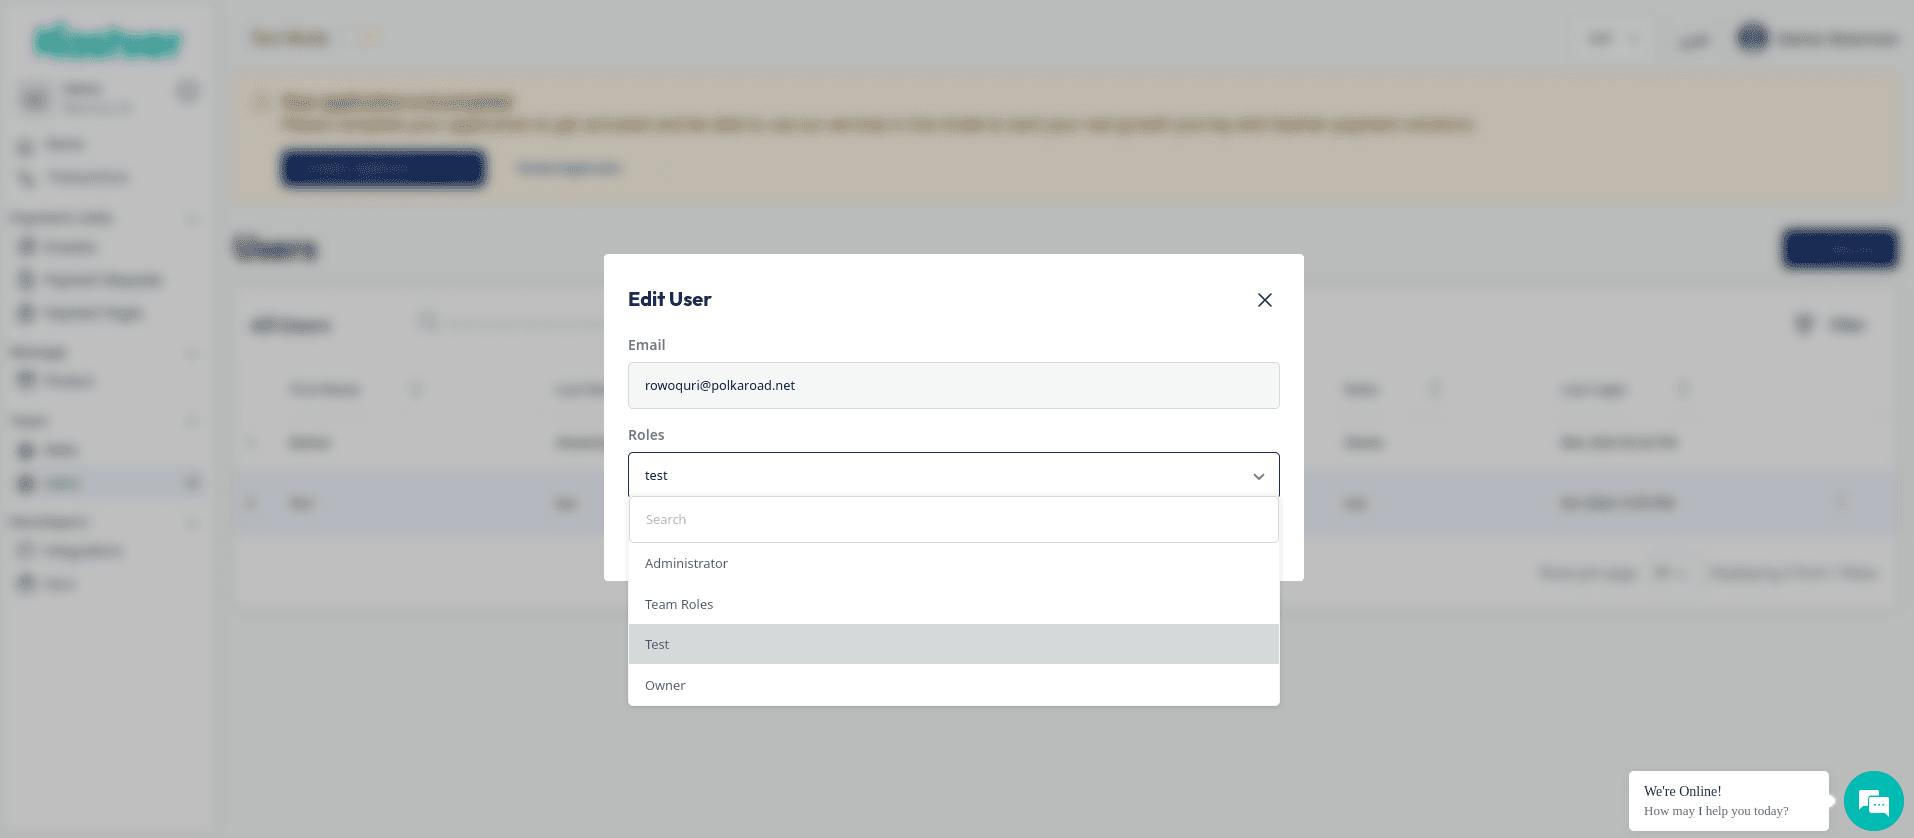
- Choose a default or custom role by clicking the menu selector. This displays all available roles.
- Click "Save" to update the team member's permissions.
About custom user roles
Custom user roles let you control exactly what team members can see and do on the Kashier Dashboard. If default roles don't meet your needs, you can create a custom role with specific permissions.
Steps to create custom user roles on the Kashier Dashboard
- Navigate to the "Manage Team" section on the Settings page, then click the "Roles" tab.
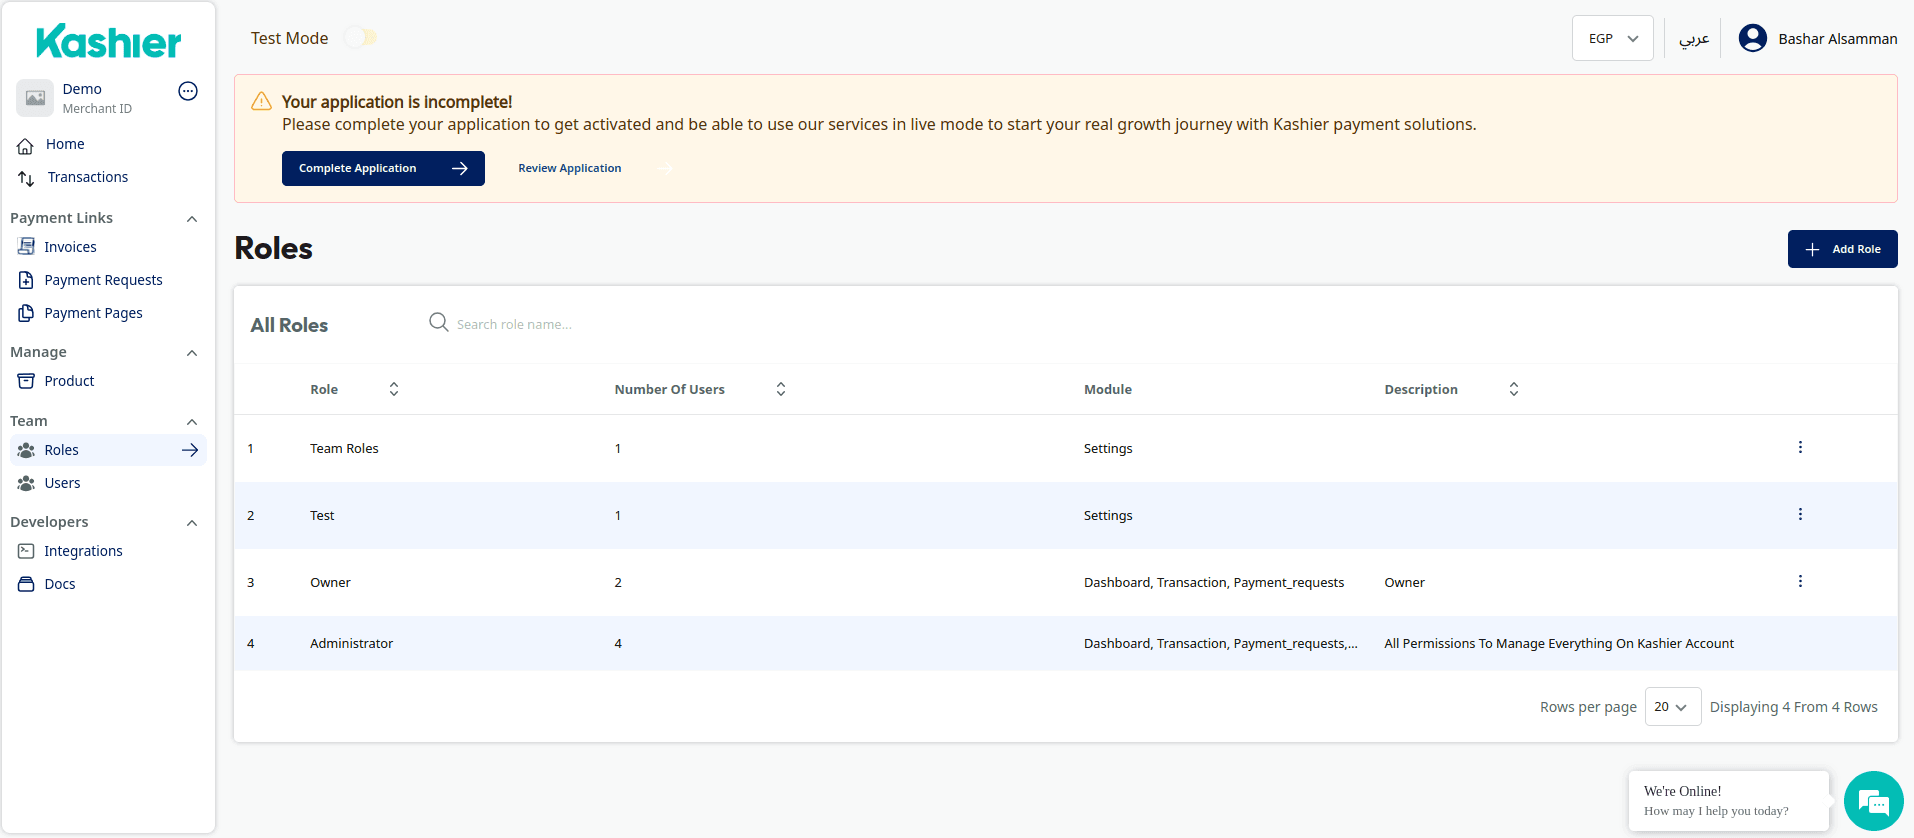
- Click "Create Role" to open the custom role creation form.
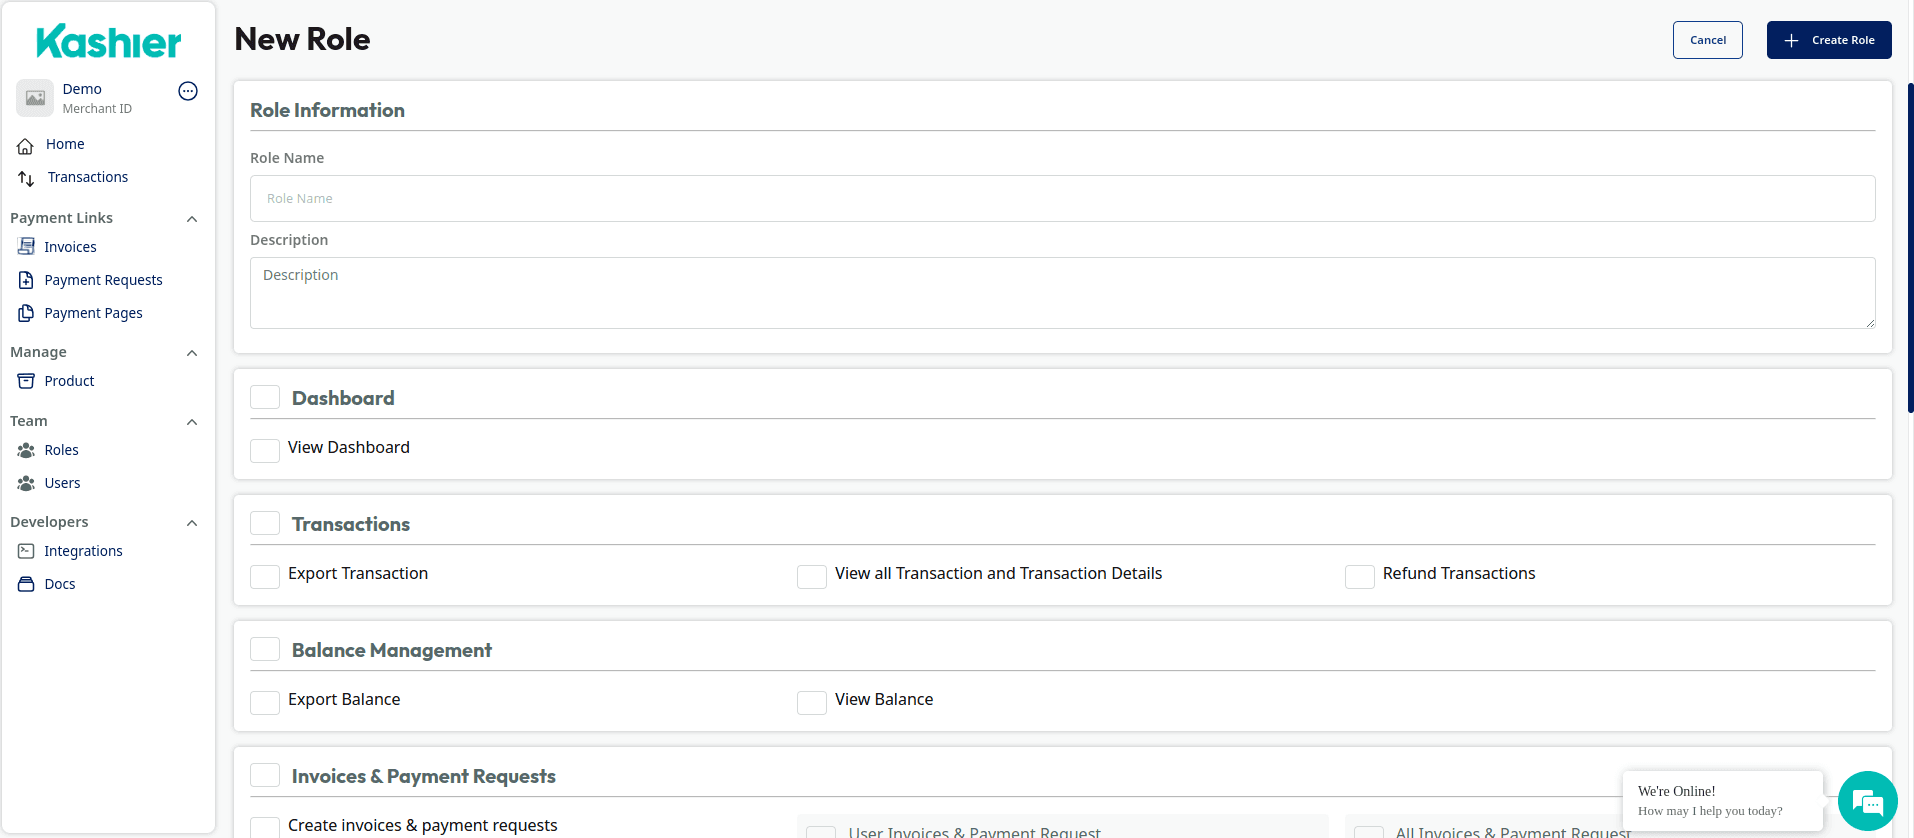
- Fill out the form and click "Save Changes" to create your custom role.