
App-to-app integration
Connect your Android app to POS terminals via the SDK
Prerequisites
- Server IP addresses: you must provide the IP addresses of your servers (for both incoming and outgoing calls/requests from your application) so that we can whitelist them with our network provider.
- Application (APK) file: you must provide the APK file of your application. We will sign it to ensure it is authorized to run on our machines.
Download the SDK
Download the KashierIntegration release (kashierintegration-0.0.7-release.aar)
Install
-
Add the AAR file to the
libsfolder. Convert your app from Android to Project view, then navigate to theapp > libsfolder.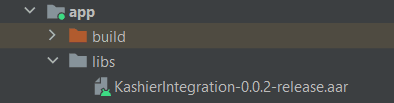
-
Add the dependencies. You need to include the dependency below in your
build.gradle.
Now you're ready to sync your project.
Usage
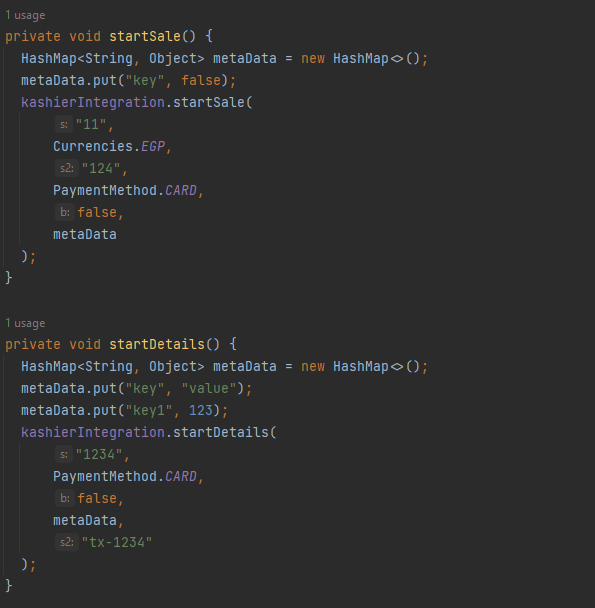
The SDK provides two functions to initiate payment: startSale() and startDetails().
-
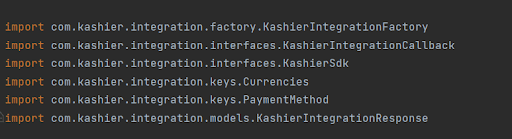
Import the following classes.
-
Implement
KashierIntegrationCallbackandKashierIntegrationFactory.

-
To make a sale transaction, call the
startSalemethod and pass the following parameters:Parameter Description amount The amount of the transaction sale. currency EGP, USD, GBP, EUR. merchantOrderId Your integration ID. paymentMethod card, wallet, installment, valu. printReceipt true: Allow auto printing for the receipt; false: Do not allow auto printing for the receipt. metaData mapOf(String(), Any()): Any data you want to pass through the integration. -
To get details of any transaction, call the
startDetailsmethod using the transaction ID. You need to pass the same parameters as in step 3, plus one additional parameter:Parameter Description trxId The ID of the transaction. 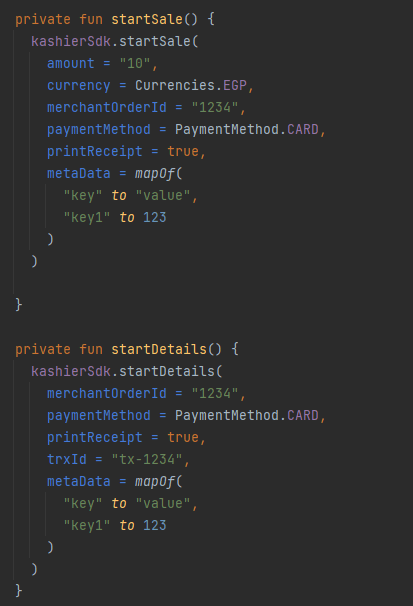
-
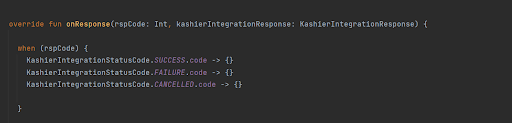
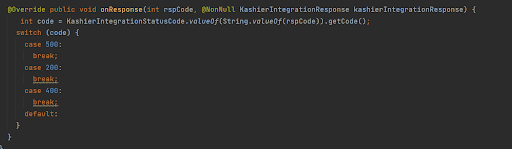
As a result of the above code, you should expect values returned in your response to update your backend.
-
Response codes:
Response Code Description 500 Transaction canceled. 400 Transaction failure. 200 Transaction success.